
Windy.com for Pilots: Complete Aviation Weather Planning Guide
If you've been relying solely on traditional aviation weather sources, you might be missing out on one of the most powerful flight planning tools available to general aviation pilots: Windy.com.
Originally designed for wind sports enthusiasts, Windy has evolved into a sophisticated weather visualization platform that's becoming indispensable for pilots who want to see weather data in ways that traditional aviation weather products simply can't match.
Windy.com is the best way to supplement your aviation weather briefings
Why Pilots Are Turning to Windy.com
Traditional aviation weather briefings give you the data you need - METARs, TAFs, AIRMETs, SIGMETs - but they often lack the visual context that helps you truly understand what's happening in the atmosphere. Windy bridges this gap by providing:
High-resolution weather model visualization that shows you the complete weather picture
Multiple forecast models (GFS, ECMWF, NAM) so you can compare predictions
Animated weather systems that help you understand timing and movement
Winds aloft visualization at multiple altitudes
Satellite and radar integration for real-time conditions
Free access to professional-grade weather data
The key advantage? Windy helps you see the weather, not just read about it. This visual understanding can be the difference between confidently launching on a cross-country flight and making a last-minute scrub decision at the runway.
Getting Started: Setting Up Windy for Aviation
Before you dive into flight planning, you need to configure Windy for aviation use. Here's how to optimize the platform:
Choose Your Weather Model
Windy offers multiple weather models, but pilots primarily use three:
ECMWF (European Centre for Medium-Range Weather Forecasts) - Generally considered the most accurate global model, updated twice daily. This is your go-to for flights 2-7 days out.
GFS (Global Forecast System) - The American model, updated four times daily. Great for shorter-term forecasts and comparing against ECMWF.
NAM (North American Mesoscale) - Higher resolution for North America, best for detailed local weather within 3 days.
For most flight planning, start with ECMWF and cross-reference with GFS if you see significant differences.
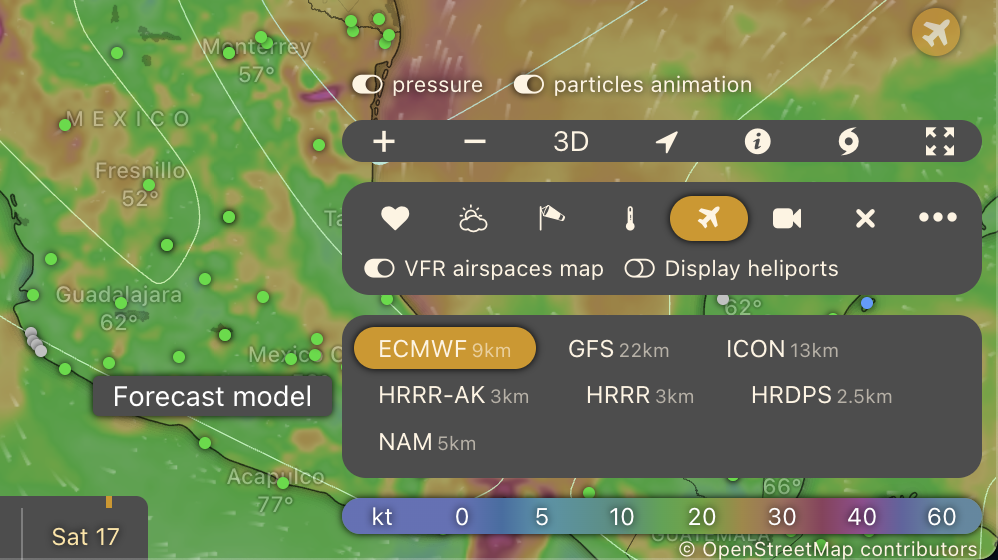
Some of the forecast models available in Windy.
Essential Layers for Pilots
Access Windy's layer menu and familiarize yourself with these critical overlays:
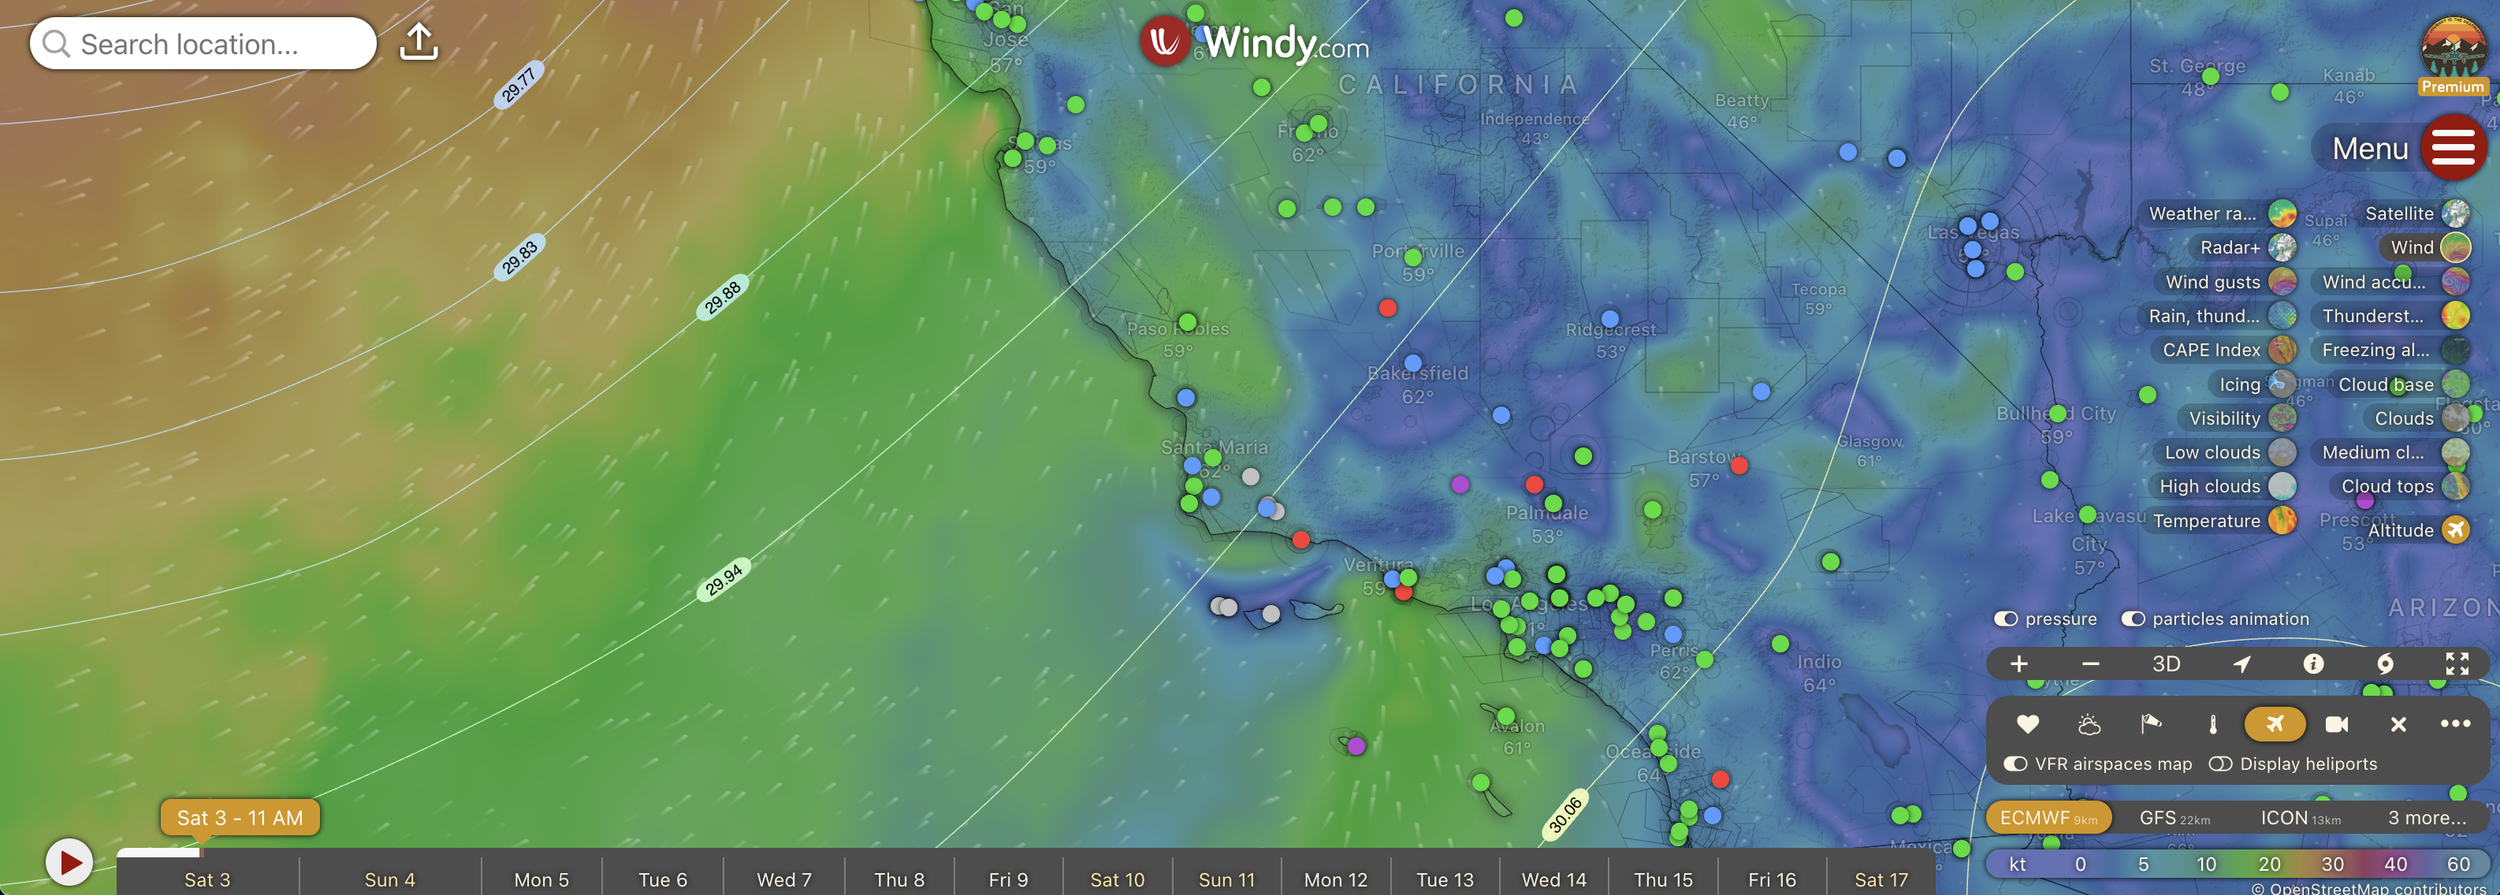
Wind - One of the most-used layer. Shows wind speed and direction at your selected altitude. You can animate this to see how winds change throughout your flight window.
Clouds - Displays forecast cloud coverage and bases. Essential for VFR pilots planning routes under ceilings.
Rain/Thunder - Shows precipitation and convective activity. The thunder layer specifically helps you identify areas of potential thunderstorm development.
CAPE (Convective Available Potential Energy) - An advanced layer that shows atmospheric instability. High CAPE values indicate potential for strong convection and turbulence.
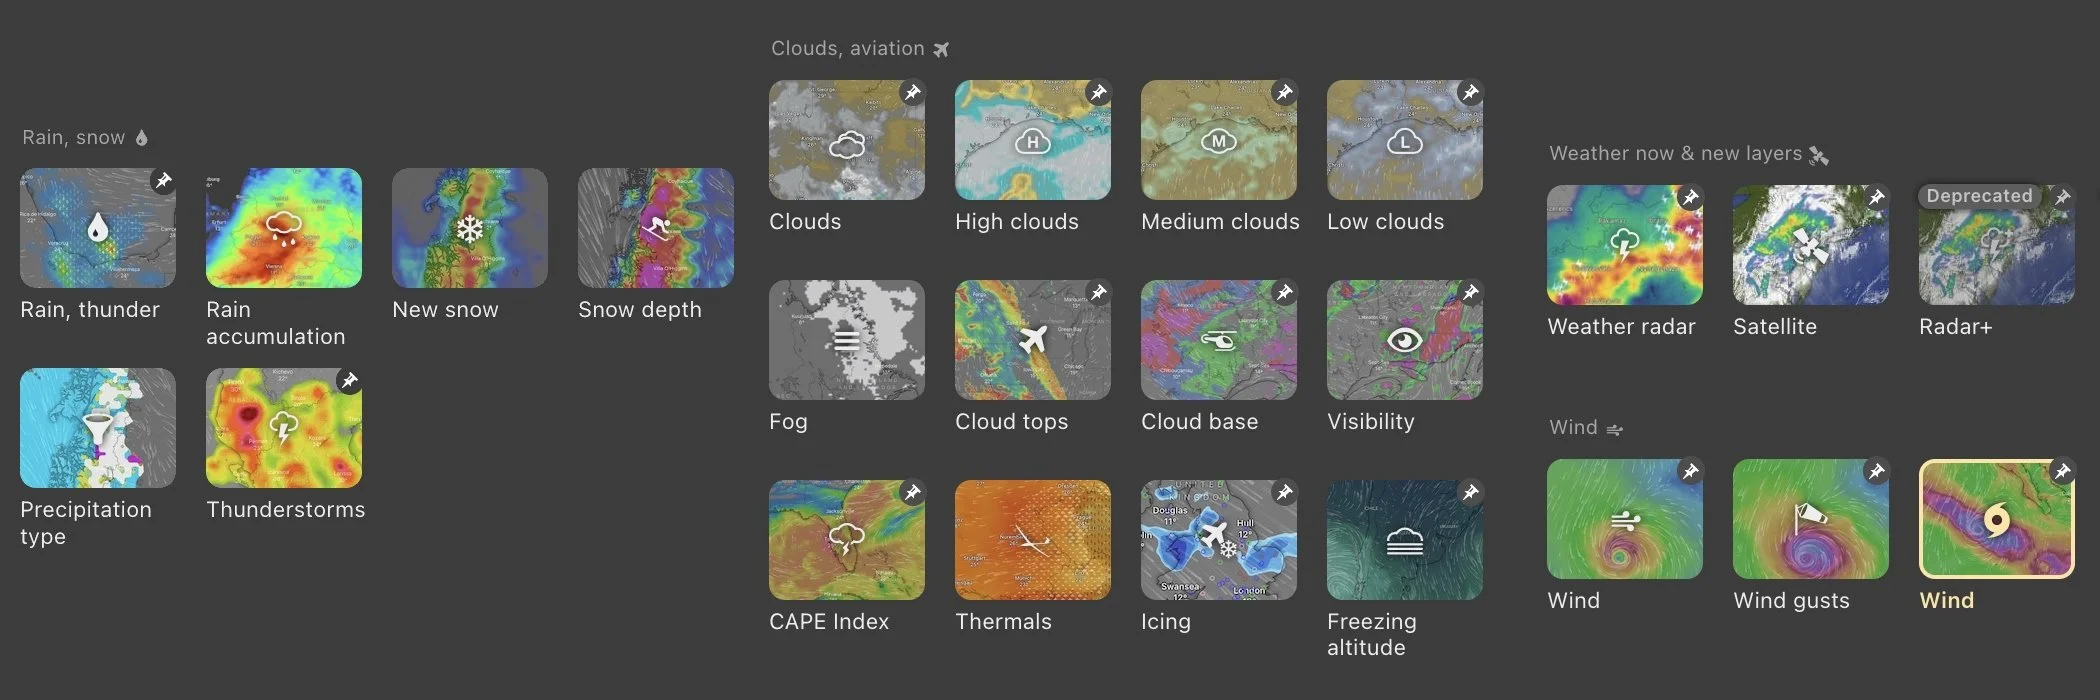
Some of the incredible layers available in Windy
Customize Your Display
Set your preferred units (knots for wind speed, feet for altitude)
Adjust the map to show your typical flying area
Enable the altitude slider to check winds aloft at your cruising altitude
Turn on airport overlays to see METARs alongside Windy's forecast data
Reading Winds Aloft for Cross-Country Planning
One of Windy's most powerful features for pilots is its winds aloft visualization. Here's a basic approach:
Set your planned cruising altitude using the altitude slider (typically found on the right side)
Animate the forecast to see how winds evolve during your planned flight time
Look for wind patterns - Are you flying with a tailwind or headwind? Will winds shift during your flight?
Check wind speeds at your departure and arrival times
For a simple example: If you're planning a flight from Los Angeles to Las Vegas at 9,500 feet, set Windy to that altitude and your departure time. You might see westerly winds at 25 knots - a nice tailwind for your eastbound flight. But animate it forward to your return time, and those same winds become a significant headwind to plan for.
This basic wind check takes 30 seconds in Windy and can dramatically improve your fuel planning and ETA accuracy.
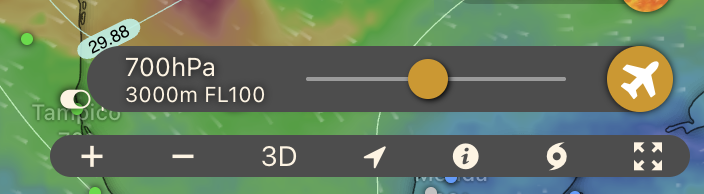
The Altitude slider.
Understanding Weather Movement and Timing
Unlike static weather reports, Windy's animation feature lets you watch weather systems develop and move. This is crucial for timing decisions:
Morning coastal fog burn-off - Watch the cloud layer dissipate
Cold front passage - See exactly when the front crosses your route
Convective development - Watch afternoon thunderstorms build and track their movement
System clearing - Determine if weather will improve or deteriorate during your flight
The ability to scrub through time and watch weather evolve gives you confidence in your go/no-go decision that static forecasts simply can't provide.
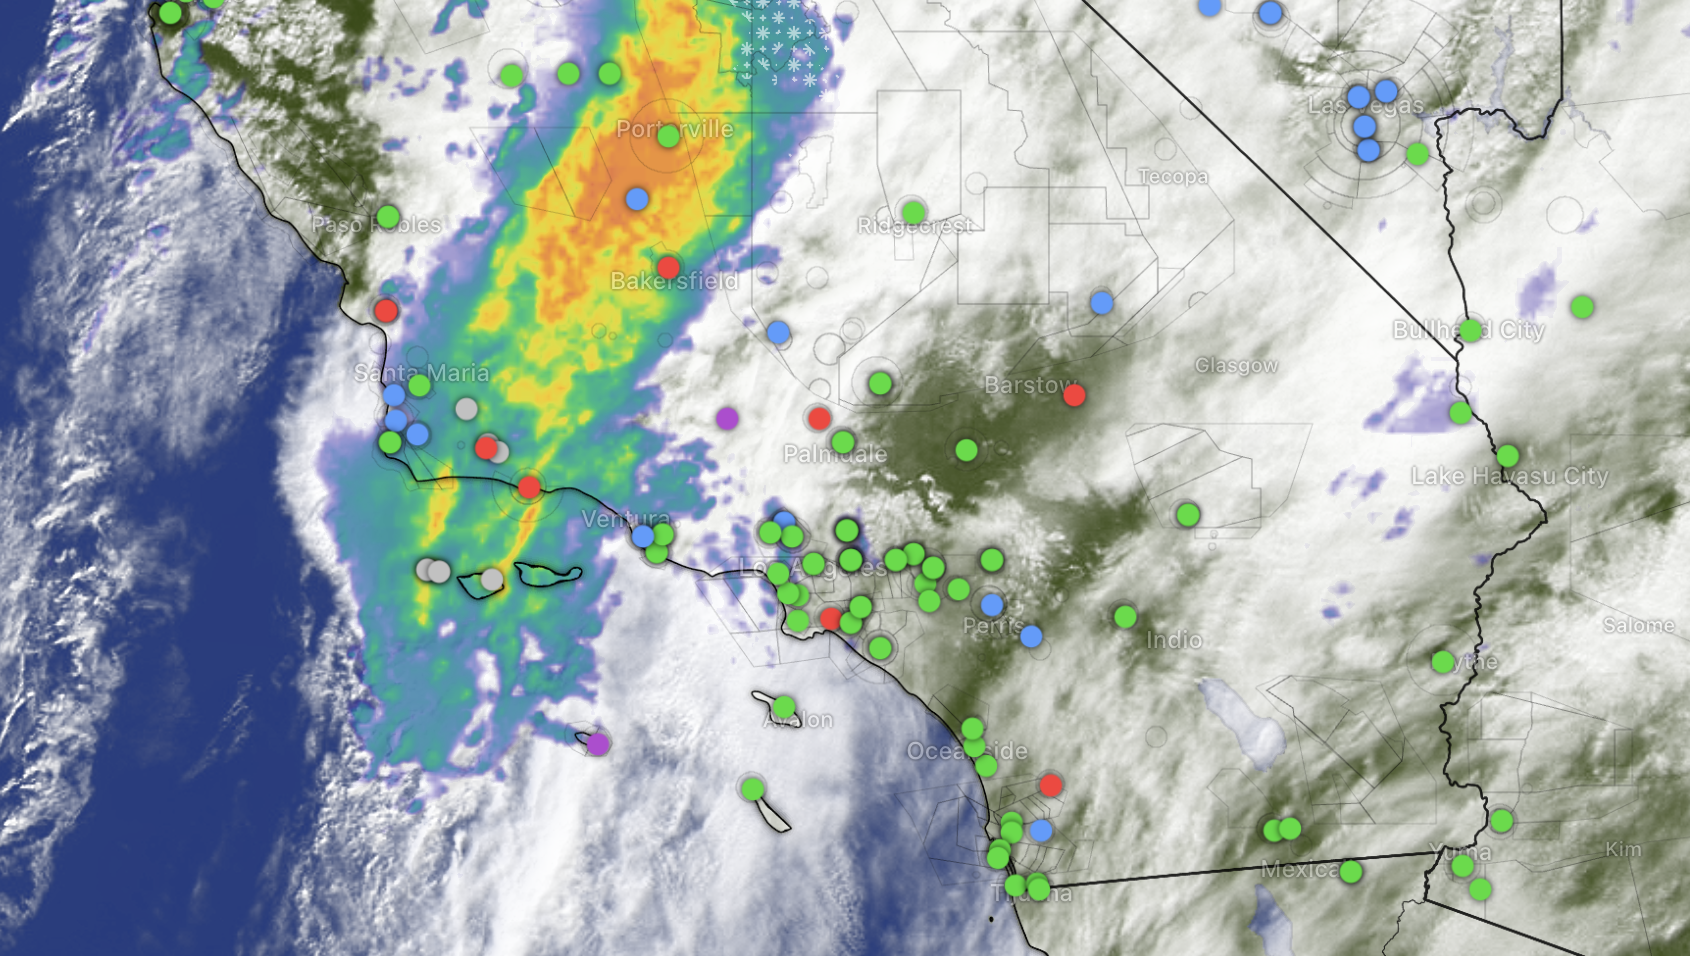
Satellite and Radar together on one layer, with color coded METARs
Limitations Every Pilot Should Know
Windy is powerful, but it's not a complete replacement for official aviation weather products:
Not for Regulatory Compliance - Windy doesn't satisfy FAA weather briefing requirements. You still need an official briefing from 1800wxbrief, ForeFlight, or another approved source.
Forecast, Not Actual - Windy shows model forecasts, not real-time conditions. Always cross-reference with current METARs, PIREPs, and radar.
Model Limitations - All weather models have accuracy limitations, especially beyond 48-72 hours and in complex terrain.
Think of Windy as your weather visualization tool that helps you understand the atmospheric picture, then verify and supplement with official aviation sources.
Real Flight Planning Example
Let's walk through a basic scenario: You're planning a VFR cross-country from Phoenix to Albuquerque, departing tomorrow morning at 9 AM.
Step 1: Open Windy and set your departure time to 9 AM tomorrow.
Step 2: Zoom to your route and check the cloud layer. You see scattered clouds forecast at 8,000 feet - manageable for your planned altitude of 10,500 feet.
Step 3: Switch to the wind layer and set altitude to 10,500 feet. You see westerly winds at 15 knots - nearly direct tailwind. Nice.
Step 4: Animate forward to your arrival time (around noon). Clouds are building over the Albuquerque area, and you notice increasing CAPE values indicating possible convective development.
Step 5: Check the thunder layer. It shows potential thunderstorm activity developing around 2-3 PM over your destination area.
Decision: This simple Windy check reveals you should plan for an earlier departure if possible, or be prepared for possible delays or diversions due to afternoon convection. You now know to monitor the situation closely and have alternate plans ready.
This entire analysis took about 3 minutes in Windy and gave you critical insight into the timing and evolution of weather along your route.
Taking Your Weather Planning to the Next Level
This guide covers the essentials of using Windy.com for basic flight planning, but there's significantly more depth to master:
Advanced weather model interpretation and when each model performs best
Understanding and interpreting the most powerful tool - the Meteogram
Detailed convective weather analysis using multiple parameters
Integration strategies combining Windy with ForeFlight, Garmin Pilot, and official briefings
Mountain flying weather considerations using terrain and wind data
Coastal weather patterns including marine layers and sea breezes
Weather planning is a skill that separates good pilots from great ones. Understanding not just what the weather is doing, but why it's doing it and how it will evolve gives you the confidence to make better go/no-go decisions and execute safer, more efficient flights.
Ready to master professional-level weather planning with Windy? Our comprehensive Windy for Pilots course takes you from basic visualization to advanced interpretation with real-world flight planning scenarios, decision-making frameworks, and the deep understanding you need to use this powerful tool with confidence.
About the Author: Eric aka “SoCal Flying Monkey” is an FAA Certified Advanced Ground Instructor. He’s given talks for FAAST (the FAA Safety Team), Aviation Explorers, and his scenario videos have been featured in The Finer Points Ground School App. He’s led groups of pilots on adventures throughout Baja Mexico and he has a popular aviation Youtube channel that focuses on his family adventures in their Cherokee 6.